

Maybe you have been on Pinterest for years, pinning recipes and home decor ideas. Or maybe Pinterest is still new to you. Either way, you know you need to start using Pinterest for your business, and I am going to walk you through how to switch your account to a business account. If you are creating a new Pinterest Account, the steps are the same after you create your account.
The main reason to use a business account instead of a Personal account is so you can see your analytics. You will be able to determine your most popular pins, and what is converting to website clicks. You will also be able to take advantage of Rich Pins that are connected to your website and give users more information on your pins. Promoted Pins are also available to Business Accounts if desired.
Start a New Account or Switch a Personal Account to Business?
If you have been using Pinterest, a common question is, “Do I need to create a new account for my business?” In most cases, I would say no, go ahead and just change your Personal account to Business. The reason is most personal accounts have some traction going for them already. You probably have some pins at least semi-related to your niche. You also probably have some followers. Both of these things can give you a head start as you begin your Pinterest Business Account.
If you don’t have many followers, or are starting at zero, no worries! Luckily, Pinterest success isn’t dependent on follower count. With good SEO, Pinterest will show your pins to people who want to see them!
The only time I would say to create a new account for your business is if the business is a completely different niche than your personal account. In that case, your pins and boards won’t be related at all to your business. Also, your business niche may not resonate with your current followers. With that said, take a good look at your personal account to see if your current content would be useful to the business.
How To Switch your Personal Account to a Business Account
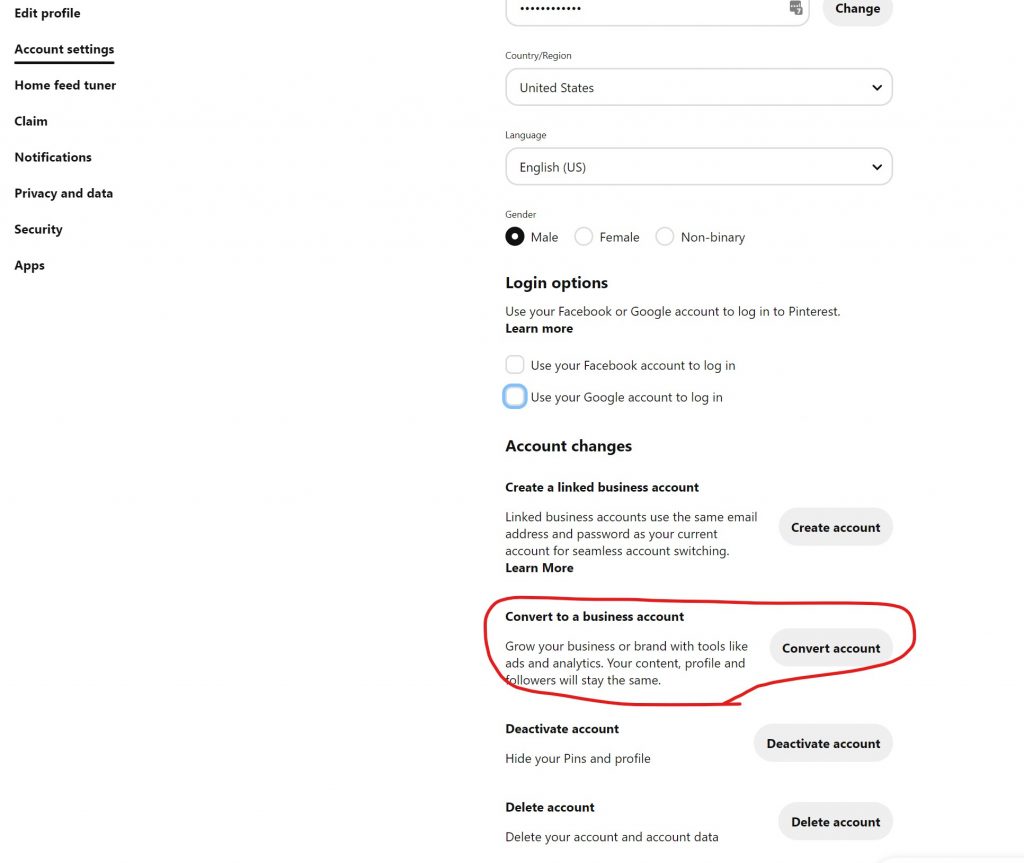
The act of switching your Personal account to Business is pretty simple. From your profile select the three dots in the corner and go to Edit Settings. Now on the left side, select Account Settings, and under Account Changes, select “Convert to a Business Account” (see below). There is an option to Create a Linked Business Account to your personal account, but I find it is easier to keep your business and personal account separate (if you need two accounts). This is especially the case if you might have a VA or Pinterest Manager managing your account in the future.
Claim your Website
You will also want to claim your Website. This will help identify pins that come from your website. You’ll be able to see pins from your website in your analytics. It will also help users find your website from Pinterest (We all want more website views, right?). I have claimed websites on several different platforms, and there are multiple ways it can be done.
To get started, go to the Pinterest Menu (3 dots in the corner), and select “Edit Settings”, then choose “Claim.” Then you will need to add a meta tag to your website.
On a self-hosted WordPress site, the easiest way to add the meta tag is to use the Yoast SEO PlugIn, where you can paste your metadata confirmation under Social > Pinterest.
For WordPress hosted (www.wordpress.com) sites, you can paste the metadata under Tools > Marketing.
You can also claim accounts for Instagram, Etsy, and YouTube. It is one of those things that if Pinterest is giving you the tool, you should use it!

Enable Rich Pins
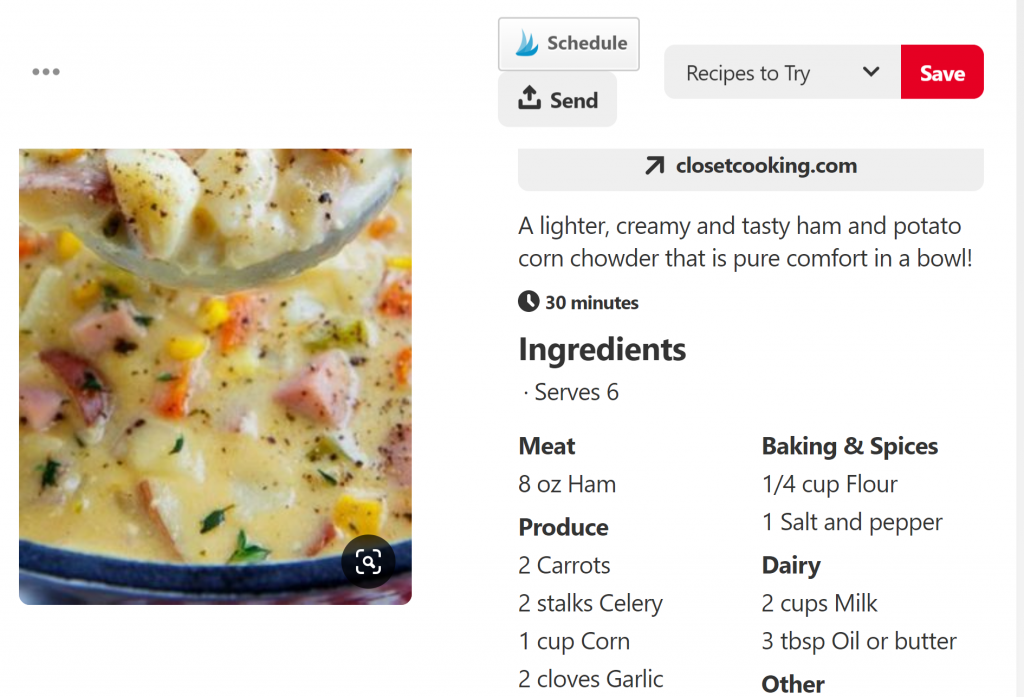
Rich pins are another tool that if Pinterest is saying to use them, you will benefit from using them. When a site has Rich Pins enabled, the pins from that site will include extra information. For example, the recipe pins you see that already have the recipe below the pin. For recipe pins, you will also need a Recipe Plugin, which will determine which information shows on the pin. Non-recipe pins will show article titles and snippets, and sometimes the author.
Below is an example of a Recipe Rich Pin. Notice the ingredients displayed in the side bar. The user still has to click through to the website to see instructions for the recipe, but they can see the ingredients right from the pin.
If you use Squarespace, your site is already set up with the proper metadata for Rich Pins.
If you use WordPress, you will want the Yoast plugin. Go to Social > Facebook > Switch “Add Open Graph Meta Data” to Enabled.
Update: As of October 2023, you no longer need to use the Rich Pin Validator to enable rich pins. As long as you have the Open Graph Meta Data, you should be good to go!
The next step is to verify your Rich Pins so they will appear on Pinterest. Just go to the Rich Pin Validator and paste any blog post URL in the form. If your information is validated, you will be able to select “Apply Now” to apply for Rich Pins. It can take a little while for your blog to be approved, but your rich pins will start showing on Pinterest in a few days.
Next Steps
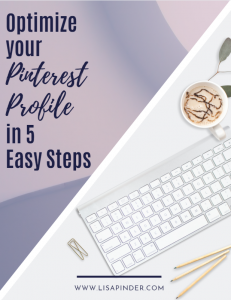
Now that you have your Business Account set up, the next step is to optimize your profile for Pinterest SEO and clean up your boards. Grab my guide to learn how to optimize your Pinterest Profile in 5 Easy steps here!
If you know these are tasks that you don’t want to tackle, take a look at my Pinterest Management packages where I can take care of all of these steps for you, including Profile optimization and board clean up!
Related Post: Ultimate Beginner’s Guide to Pinterest

How do I switch to a pinterest business account
Hello! The current process is to go to your Pinterest Settings > Account Management > Convert to a Business Account.
How do I sell my handmade crochet hats which range from sizes preemies to adults and style are if animals Characters and regular hats
I just love pinterest, amazing information, helpful in each and every field, thank you
I just love pinterest, amazing information, helpful in each and every field, thank you
how do I open an account
If you go to pinterest.com, on the login screen it says, “Not on Pinterest Yet? Create an account.” That will open the account. You might find this post helpful for getting started: https://lisapinder.com/beginners-guide-to-pinterest/